If you’ve ever stood in a manufacturing facility, foundry, or industrial lab where temperatures soar well above what regular temperature sensors can handle, you know the frustration of unreliable heat monitoring. As a supplier of high-temperature thermocouples, I’ve spent thousands of hours talking to plant managers, engineers, and maintenance teams who’ve wasted time and money on failed temperature readings—all because they skipped the critical step of proper installation. A thermocouple is only as good as how it’s put in; even the highest-grade, most expensive probe will give skewed, inaccurate data (or stop working entirely) if installed incorrectly. Today, I’m walking you through the step-by-step process we’ve refined over years of supporting industries from metal smelting to glass production, so you can get consistent, reliable high-temp readings every time. High Temperature Thermocouple
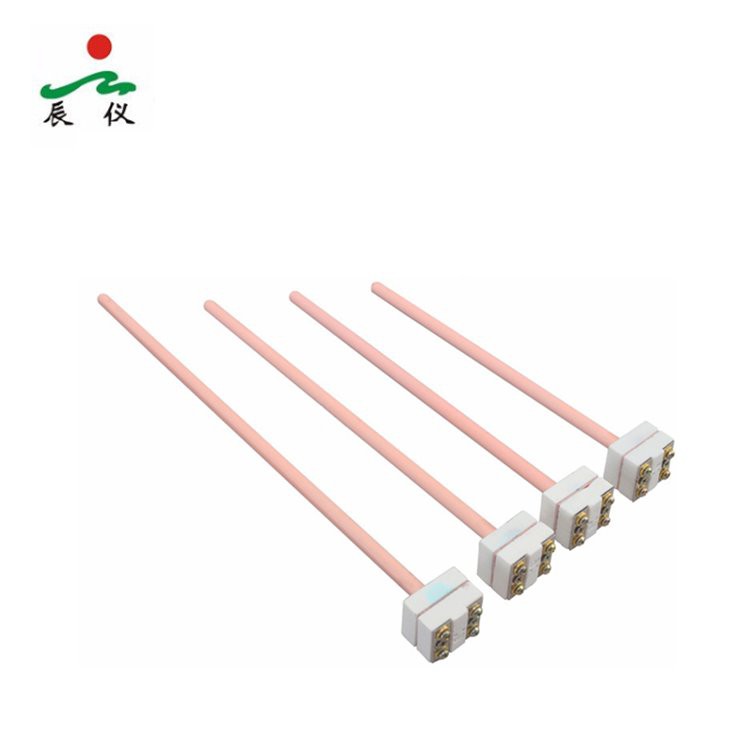
First, let’s get one thing straight: high-temperature thermocouples aren’t the same as the cheap ones you use for a backyard grill or a home oven. These are built to withstand sustained temperatures of 1,200°C (2,192°F) and higher, with materials like platinum-rhodium, tungsten-rhenium, or reinforced ceramic sheaths that resist corrosion and thermal shock. But their performance relies entirely on being installed to match the specific application’s demands. Before you even grab your wrench and start working, pause to do three pre-installation checks that’ll save you headaches later.
First, confirm you’ve got the right thermocouple for the job. I can’t tell you how many times I’ve had a customer come to me with a broken thermocouple, saying “they all work the same,” only to find they installed a type K thermocouple (good up to ~1,260°C) in a furnace running at 1,400°C. That’s a recipe for failure. Type S, R, or B platinum-rhodium thermocouples are standard for ultra-high temps, while tungsten-rhenium types are better for even hotter, inert environment applications. Also, check the sheath material: a ceramic sheath works great for clean, oxidizing atmospheres, but it’ll crumble in a molten metal environment where you need a heavy-duty metal alloy sheath. Don’t cut corners here—using the wrong thermocouple for your operating conditions is the number one cause of premature thermocouple failure.
Second, map out your installation location carefully. Where you place the thermocouple matters more than you think. If you’re monitoring the temperature inside a furnace, don’t mount it near the door or any heat exchange points that have wildly fluctuating temps. Instead, place it in the zone you care about—say, the center of the crucible in a melting furnace, or the hot zone of a kiln. Avoid areas where the thermocouple will be exposed to direct, uneven heat or where vibration from nearby machinery can damage the sheath. Also, calculate the insertion depth: for most high-temperature applications, the active measuring junction needs to be at least 6 times the diameter of the sheath inside the hot zone. A common mistake is inserting the thermocouple too far up the thermowell, so the junction never actually reaches the peak temperature you’re trying to measure.
Third, gather your tools and safety gear. High-temperature installations mean working around extreme heat, hot surfaces, and potentially hazardous processes. You’ll need the thermocouple, a matching thermowell (we always recommend using a thermowell for permanent installations—it protects the thermocouple from mechanical damage, corrosion, and contamination), a wrench for tightening fittings, high-temperature sealant (rated for the same temp as your application), safety glasses, heat-resistant gloves, and a respirator if you’re working in an area with fumes from molten materials or hot gases. Never skip safety steps; even a minor burn from a hot thermocouple or fitting can turn serious in a high-heat environment.
Now, let’s get to the actual installation process, step by step, designed for permanent high-temperature thermocouple setups (the most common use case for industrial operations).
Step 1: Prep the site and components. First, turn off any power or heat to the system you’re working on—you’ll be working with hot components, and you don’t want any accidental startup while you’re installing. Once the system is cool enough to work safely (always wait for it to reach ambient temp, don’t rush this), inspect your thermocouple and thermowell for damage. Check for cracks in the ceramic sheath, bent metal parts, or frayed wire connections. A small crack in a ceramic sheath can let contaminants seep in and damage the thermocouple junction before you even start using it, so if you spot damage, swap it out for a new one. Next, clean the end of the thermowell with a soft brush or compressed air to remove any dust, corrosion, or leftover debris that could affect heat transfer.
Step 2: Insert the thermocouple into the thermowell. This is where many go wrong. Hold the thermocouple by the sheath (never pull on the wire itself—high-temp thermocouple wires are delicate and can break if tugged) and carefully slide it into the open end of the thermowell. Push it until you feel gentle resistance, which means the measuring junction is touching the bottom of the thermowell. Remember that insertion depth we talked about earlier? If the thermowell is long enough, you might need to stop before it hits the bottom, leaving enough space to account for thermal expansion—metal and ceramic expand when heated, so if you push the junction all the way to the bottom at room temp, it could crack the thermowell when it heats up. For most industrial thermowells, leaving 10-15mm (0.4-0.6 inches) of space at the bottom is the right call. Once the thermocouple is in place, secure it temporarily with a small clip or piece of heat-resistant tape so it doesn’t shift while you install the fitting.
Step 3: Install the thermocouple fitting. The fitting is what seals the thermocouple and thermowell in place, preventing hot gases from escaping and keeping contaminants out. Most high-temperature thermocouples use compression fittings or threaded fittings; follow the instructions specific to your unit, but the general process is the same. Wrap the threads of the fitting with a high-temperature, heat-resistant thread sealant (make sure it’s rated for your operating temp—regular Teflon sealant will melt at ultra-high temps and fail) or use a graphite-based gasket, which is ideal for high-heat applications. Screw the fitting into the designated port on your furnace, kiln, or process vessel, and tighten it with a wrench—don’t over-tighten, as that can crack the thermowell or strip the threads, but make it snug enough that there’s no gap. Once the fitting is secure, double-check that the thermocouple is still in the correct position and hasn’t shifted while you tightened the fitting.
Step 4: Seal and insulate the thermocouple at the entry point. The area where the thermocouple exits the vessel is a common source of heat loss and inaccurate readings. Hot gases can escape here, causing a “cold spot” that makes your temperature reading lower than the actual hot zone temp, or contaminants can get in and damage the junction. Use a high-temperature insulation paste or ceramic fiber rope to seal the gap between the thermocouple sheath and the fitting. For ceramic-sheathed thermocouples, wrap the exit point with high-temperature ceramic tape to add extra insulation and prevent heat loss. Make sure the seal is tight but not so tight that it puts pressure on the thermocouple wire, which can cause breakage over time.
Step 5: Wire the thermocouple and test for connectivity. Now that the physical installation is done, it’s time to connect the thermocouple to your temperature monitoring system. Use matching extension wires—never use standard copper wires, as they will create a cold junction error that skews readings. Connect the thermocouple wires to the extension wires, making sure the positive and negative terminals are matched (mismatched terminals will give you completely wrong readings). Once wired, turn on the monitoring system and check for a reading. If you get an “open circuit” error, that means there’s a break in the wire or a bad connection. If the reading is wildly different from what you expected, double-check that the junction is properly positioned, that you used the right extension wires, and that there are no gaps in your seal allowing cold air in.
Step 6: Perform a heat test and calibrate (if needed). Before putting the system back into full operation, do a slow, controlled heat test to make sure the thermocouple is working properly. Bring the temperature up gradually, checking the reading at several different temperature points (e.g., 500°C, 1000°C, your operating temp) against a reference temperature standard (we sell portable high-temperature calibration probes that work great for this). If there’s a consistent error between the thermocouple reading and the reference, you may need to adjust the cold junction compensation in your monitoring system. For most permanent installations, we recommend calibrating the thermocouple once a year, or after any major process change, to ensure accuracy.
Now, even if you follow every step, high-temperature thermocouples will eventually fail—this is normal, because they’re exposed to extreme heat, vibration, and corrosion. But proper installation can extend their lifespan by 20-50%, saving you the cost of frequent replacements and downtime from unplanned shutdowns. We’ve seen customers cut their thermocouple-related costs in half just by following these installation steps, and that’s why we share this knowledge openly—good installation makes for happy, long-term users.

If you’re new to working with high-temperature thermocouples, or if you’re planning a big project with ultra-high temps, don’t hesitate to reach out. We’re not just a supplier—we work with teams to match the right thermocouple to your specific application, provide installation guidance, and help you troubleshoot any issues that come up. Whether you need a single thermocouple for a lab setup or a full set for a large-scale industrial furnace, we can help you find the right solution. Contact our team to discuss your needs, and we’ll be happy to walk you through every part of the process, from selecting the right product to installing it correctly.
Bimetal Thermometer References
- High-Temperature Temperature Measurement: Thermocouples, RTDs, and Pyrometers. International Society of Automation (ISA), 2021.
- Thermocouple Installation and Application Guidelines. National Institute of Standards and Technology (NIST), 2019.
- Materials for High-Temperature Thermocouple Sheaths. Journal of Industrial Heating, Vol. 87, No. 4, 2020.
- Industrial Process Temperature Measurement and Control. McGraw-Hill Education, 2018.
Chongqing Haichen Instrument Co., Ltd.
Chongqing Haichen Instrument Co., Ltd. is one of the most professional high temperature thermocouple manufacturers and suppliers in China for over 20 years, featured by good service and competitive price. Please rest assured to buy high quality high temperature thermocouple for sale here from our factory. For customized service, contact us now.
Address: No.11 Gusheng Road, Caojie Street, Hechuan District, Chongqing City, P.R. China
E-mail: sales@hcsensor.com
WebSite: https://www.hcsensor.com/
