Hey everyone, and welcome back to the Hydra-Tech Tools blog—your go-to spot for all things hydraulic cutting, because let’s be real, nothing kills a cutting job faster than fumbling with pressure that’s either too high or way too low. If you’ve ever stared at a half-cut steel rod, a wonky pipe, or a blade that’s just sitting there spinning instead of doing its job, you know exactly what I’m talking about. I’m Jake, one of the lead techs here, and I’ve spent the last 12 years troubleshooting hydraulic cutting tools in workshops, job sites, and even tight quarters where pressure was make-or-break. Today we’re talking about the one skill that separates guys who get the job done in an hour from those who are still there at quitting time: adjusting cutting pressure. No fancy jargon, no confusing equations—just real-world stuff I’ve picked up, plus the science that actually works. Hydraulic Cutting Tools
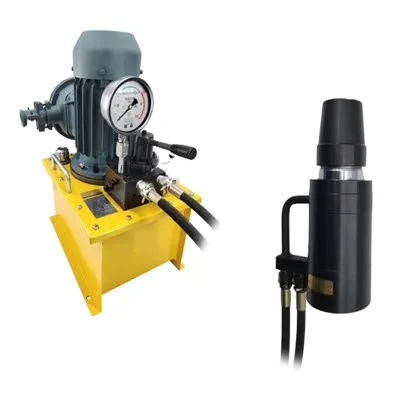
First off, let’s get one thing straight: adjusting pressure isn’t a “set-it-and-forget-it” task. I see so many folks grab their hydraulic cutter, crank the pressure to max, and call it good. Bad move. Too much pressure, and you’re burning through blades like they’re disposable plastic, wasting cash, and risking the tool’s internal seals. Too little pressure, and you’re muscling the tool, jamming the mechanism, and ending up with a cut that looks like it was done by a kid with a dull pair of scissors. The sweet spot? It depends on way more than just the tool’s specs—what you’re cutting, the condition of the tool, even the ambient temperature. Let’s break this down step by step, like I’d explain it to a new hire on our service team.
First, before you even touch that pressure adjustment knob, do a quick pre-check. This is the step most people skip, and it’s where a lot of pressure issues start. Let’s run through it: Grab your hydraulic cutter, give the blade a visual once-over. Is it sharp? Dull blades don’t need more pressure—they need to be sharpened or replaced. I’ve seen guys crank pressure on a dull blade so much that the frame of the cutter bent, just because they thought more force would fix a dull edge. Next, check the hydraulic fluid level and condition. Old, gunked-up fluid or fluid that’s too low won’t transfer pressure right, so adjusting the knob later is useless. If it’s cold out, let the tool warm up for 5 minutes—fluid gets thick when it’s cold, so pressure readings will be off. One winter last year, a contractor called me screaming because his pipe cutter wouldn’t cut 1/2-inch steel; turns out he tried using it straight from the truck, where the fluid was like molasses. Warming it up fixed it before we even touched the pressure.
Now, the actual adjustment process. This is where things get practical, not textbook. First, you need to know two things about your tool: its maximum recommended cutting pressure, and what material you’re working with. Our tools, like most hydraulic cutters, have a spec label—usually on the side of the main cylinder—that says something like “Max pressure 10,000 PSI for 3/4” steel rod.” Don’t ignore that max number; it’s there to keep your tool from blowing a seal or cracking. For most common materials: thin pipe (1/4” or less) is 3,000–5,000 PSI; 1/2” steel is 6,000–8,000 PSI; thick structural steel or rebar up to 1” is 8,000–10,000 PSI. Wait a second—you might be thinking, “Why not just go to max for everything?” Like I said earlier, too much pressure wears out blades fast, and it’s unnecessary. Also, different tool types (rod cutters, pipe cutters, bolt cutters) have different sweet spots, so don’t use the same pressure for every job.
Here’s my go-to method for adjusting, and it’s way simpler than messing with gauges all the time. Start low. Set the pressure adjustment knob to its lowest position—usually turning it counterclockwise all the way, until it stops. Then, make a test cut on a scrap piece of the exact same material and thickness you’re working on for the real job. That scrap is non-negotiable, by the way. Don’t test on the actual part you need to cut, because if it doesn’t work, you’ll waste time or ruin a good piece. When you do the test cut, watch how the blade moves. If it’s taking forever to cut, you can hear the motor straining, and the blade is just scraping instead of slicing, bump the pressure up a little—like 500 PSI at a time. Don’t crank it 2,000 PSI at once, that’s how you blow a seal. Keep making small adjustments, and test cut after each, until the blade slices through the material smoothly, with minimal strain on the tool’s motor or frame. Once it cuts clean, that’s your sweet spot.
Wait, let’s talk about that pressure knob—most tools are either manual adjustment (turn a knob) or have a pressure gauge. If you have a gauge, don’t just look at the max. I recommend taking two readings: static pressure, which is when the tool is not engaged, and dynamic pressure, which is when the blade is actually cutting. A lot of guys only check static, and it’s wrong because pressure spikes when the tool is under load. For example, static pressure might be 7,000 PSI, but when you cut, it jumps to 9,000—way too close to the max, and you’ll burn through blades. So always take dynamic readings for real adjustments. If your tool doesn’t have a gauge (we make a lot of our mid-range tools without gauges because not every job needs them), go back to the test cut method. That’s just as effective with practice.
Now, common mistakes that mess up pressure, and how to fix them. First, pressure creep. That’s when the pressure slowly goes up after you set it, usually because of a worn seal or a loose fitting. If you notice that, stop using the tool and check for leaks. A tiny hydraulic leak not only wastes fluid, it reduces the pressure at the blade, so you’ll keep adjusting higher to compensate, which just makes the leak worse. Another mistake: adjusting pressure in the middle of a cut. If you start a cut at 5,000 PSI and it’s too low, don’t crank it mid-cut. Stop, release the pressure fully, adjust, then start again. Doing it mid-cut can cause the blade to bind or even break. I’ve seen a blade shatter when a guy tried to bump pressure while cutting a thick rebar—took out a chunk of his workshop wall, not fun.
Temperature is a big one that’s overlooked, especially on job sites where it’s freezing or sweltering. When it’s hot, hydraulic fluid expands, so pressure will be higher than it is in cool conditions. If you adjust pressure in 90°F weather, come back to the job site tomorrow when it’s 50°F, the pressure will be too low, and your cuts will be messy. So always check pressure a second time if the temp changes more than 10 degrees. We had a contractor in Texas last summer who called us because his tool was cutting too fast, blowing blades every other cut; turned out he adjusted it at 7 AM when it was 70°F, and by noon it was 98°F, pushing pressure up 1,500 PSI over his setting. That’s a 30% increase—no wonder he was going through blades.
What about different tool types? Let’s get specific, because a pipe cutter is way different from a bolt cutter. For hydraulic pipe cutters: the rule is, thinner wall pipe needs less pressure, thicker wall needs more, but also consider the pipe material. PVC is almost nothing—1,000–2,000 PSI. Mild steel pipe is 4,000–7,000 PSI. Stainless steel is harder, so add 2,000 PSI minimum. For hydraulic rod cutters: rebar is the main one here. #4 rebar is 6,000 PSI, #8 is 9,000 PSI, and anything over #10? You’re getting close to the max of most standard tools, so don’t push it. For bolt cutters: soft steel bolts are 3,000–5,000 PSI, high-tensile bolts (like Grade 8) need 7,000–9,000 PSI. Pro tip: if you’re cutting high-tensile, make sure your blades are made for high-tensile material too—regular blades will snap even with the right pressure.
Now, maintenance checks that keep pressure consistent, so you don’t have to adjust every five minutes. First, change the hydraulic fluid every 500 hours of use, or every 6 months if it’s not used often. Gunk in the fluid makes pressure uneven, so fresh fluid is key. Next, inspect the relief valve regularly—this is the part that keeps pressure from going over max. If the relief valve is stuck, pressure will keep building, which is dangerous and wears out parts. We do free relief valve checks for all our regular customers, by the way, because this is such a common issue. Also, keep the tool clean—dirt and dust can get into the adjustment knob, making it hard to turn, or blocking pressure readings if you have a gauge. A quick wipe down with a rag after each job goes a long way.
Wait, let’s address a myth I hear all the time: “Higher pressure always gives a better cut.” No. A clean cut is about the blade being sharp, the pressure matching the material, and the tool being aligned, not max pressure. I had a customer last month who was using one of our heavy-duty cutters on 1-inch steel, cranking it to 10,000 PSI every time, and getting cuts that were slightly uneven and taking twice as long as they should. I showed him how to test cut on scrap, and found that 7,500 PSI was perfect for that material. After that, his blade life doubled, his cuts were smoother, and he finished jobs faster. That’s the thing—more pressure isn’t better, it’s just more unnecessary wear.
Safety note: this is non-negotiable. Never adjust pressure while the tool is under load, never exceed the tool’s max pressure, and always wear eye protection when testing cuts. I’ve had a piece of blade shrapnel graze my arm once because I cranked pressure too high on a tool with a worn seal. It was a stupid mistake that cost me a week of light work, and it’s not worth it. Also, if your tool has a pressure relief valve, make sure it’s working properly—this is your fail-safe. If the pressure spikes beyond what you set, the relief valve should kick in to keep the tool from breaking. If it doesn’t, stop using it immediately and get it serviced.
Let’s wrap this up with a quick step-by-step cheat sheet, because I know some of you just want the actionable stuff you can keep in your toolbox. 1. Pre-check: Blades sharp? Fluid full and clean? Tool warm (if cold)? 2. Grab scrap of your actual work material for test cuts. 3. Start pressure at lowest setting. 4. Make test cut, adjust pressure up 500 PSI at a time until cut is smooth, no strain. 5. If temp changes more than 10 degrees, recheck pressure. 6. Do monthly maintenance: change fluid, check relief valve, clean adjustment knob.

At the end of the day, adjusting hydraulic cutting pressure is just about understanding your tool, your material, and not overcomplicating it. Too many guys treat pressure like a magic number, but it’s actually a balance. If you’re still struggling with consistent cuts, or if you have a tool that’s not performing like it should, our team is here to help. We’ve been supplying hydraulic cutting tools to job sites, workshops, and industrial facilities for years, and we know every trick to keep your equipment running right. Whether you need a quick tip over the phone, a service check, or a new tool that’s built for the exact jobs you do, reach out to our team to connect for a product quote or to troubleshoot your current equipment. Don’t waste another hour fighting with a tool that’s not set up for your work—we’re here to help you get the job done right, the first time.
Breaching And Cutting Equipment References: Hydraulic Cutting Tools: Operation & Maintenance Manual, International Association of Plumbing and Mechanical Officials (IAPMO), 2022. Hydraulic System Pressure Adjustment Best Practices, Occupational Safety and Health Administration (OSHA), 2021. High-Performance Hydraulic Cutting Tool Blade Specification Guide, Industrial Hydraulics Association (IHA), 2023.
Changzhou Truyou Mining Equipment Co., Ltd.
Address: No. 186 Hongxi Road, Niutang Town, Wujin District, Changzhou City, Jiangsu Province
E-mail: info@truyoucoalmining.com
WebSite: https://www.truyoucoalmining.com/
